Detailed SurgEQ-L5 user guide
SurgEQ-L5 is a linked 5-band surgical EQ built for fast frequency hunting, resonance cleanup, and structured corrective work around one central Target Frequency. This guide explains the full workflow in detail, from the global controls to the per-band Listen and FX Solo tools.
- Linked 5-band corrective workflow
- Octave and Harmonic spacing modes
- AutoListen, Listen, and FX Solo audition
- Analyzer-assisted frequency hunting
This is a web-based guide. You can read it in the browser or print it as a PDF if needed.
Guide Contents
The plugin has more moving parts than a basic EQ, so this guide is organized by workflow rather than by a short control list. Start at the top and move section by section, or jump straight to the area you need.
1. What SurgEQ-L5 Is
SurgEQ-L5 is not a general-purpose tone EQ and not a vintage-style color tool. It is a workflow-first surgical EQ designed to make resonance hunting faster by organizing five corrective bands around one central Target Frequency.
Core idea
In a standard EQ, you usually build each band independently. That can be flexible, but it can also be slow when the real goal is to scan a group of related frequencies. SurgEQ-L5 solves that by creating a linked map of five bands around a center point.
Once the map is in place, you can switch the spacing logic, audition bands quickly, fine-tune their offsets, and decide where the most useful corrective cuts should live.
2. Main Workflow
The fastest way to use SurgEQ-L5 is to work from broad structure to precise correction. Instead of immediately editing every band, start with the map, then narrow your focus.
Set the Target Frequency near the problem region you want to inspect.
Choose Octave or Harmonic mode depending on how you want the linked spacing to behave.
Use AutoListen, Listen, or FX Solo to hear where the useful action is.
Refine Bell or Notch mode, Gain, Q, and Fine Tune for the specific band.
Compare the result in context, adjust Output if needed, and finalize the cleanup.
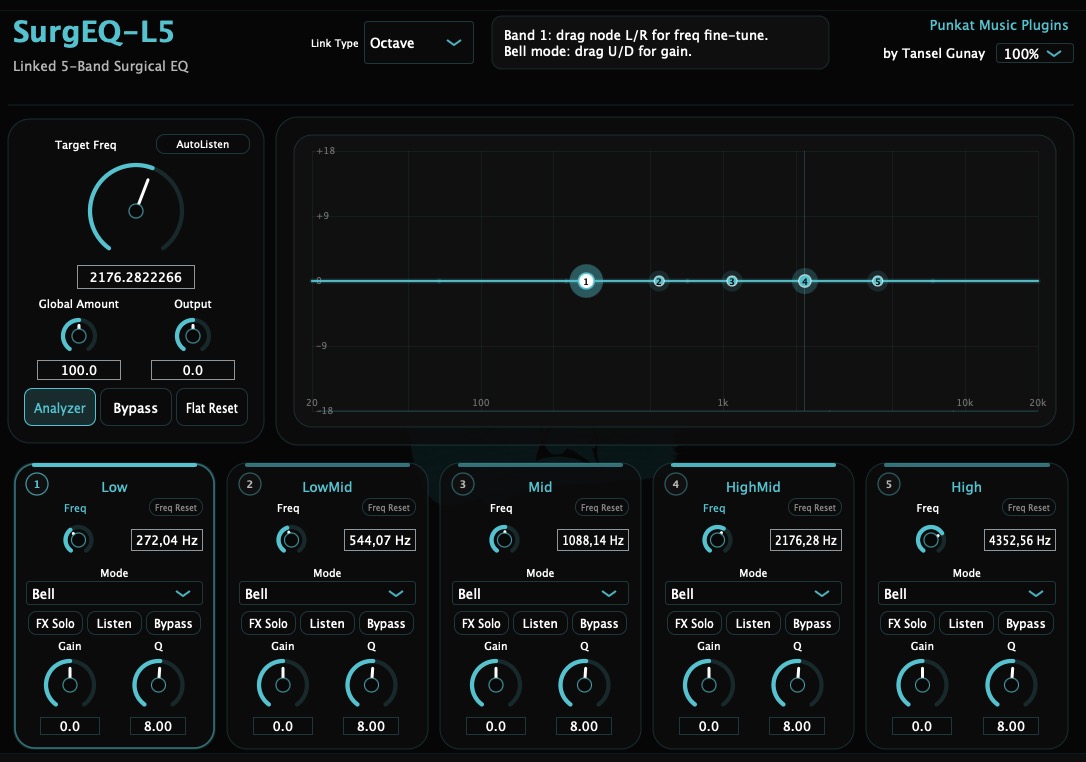
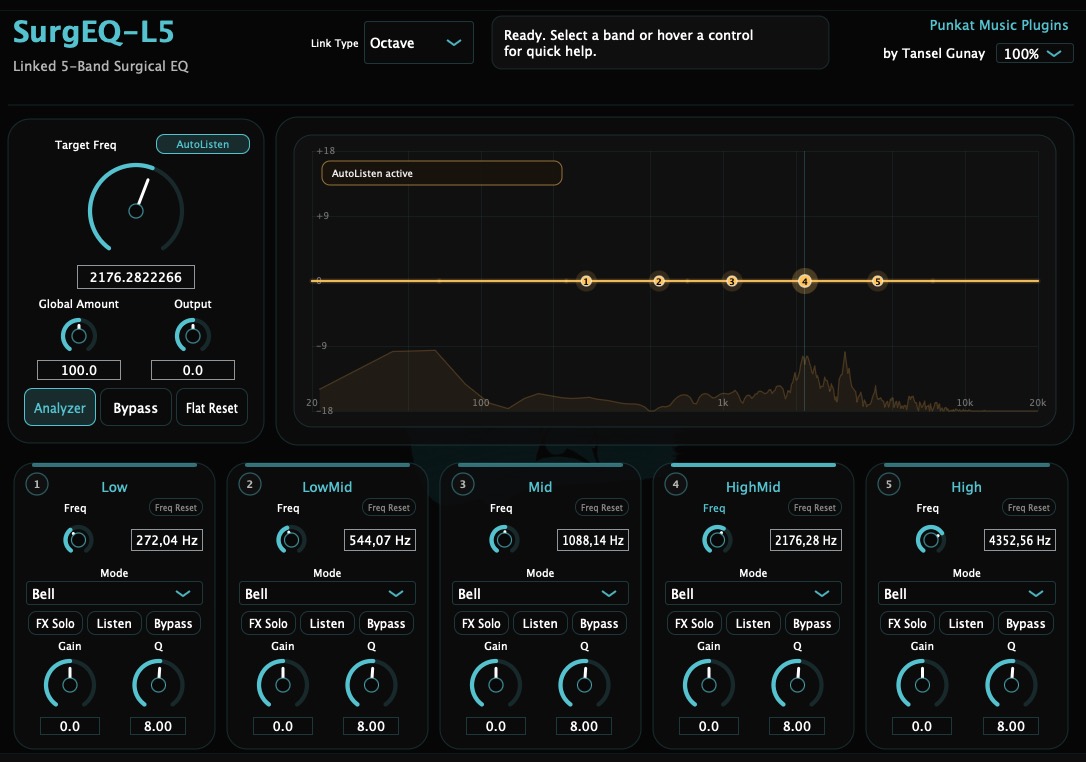
3. Global Controls
The left-side control block and the top controls define the overall behavior of the plugin before you start editing individual cards.
Target Frequency
This is the anchor point for the entire linked structure. As you move it, the five mapped bands reposition around the new center according to the active Link Type.
AutoListen
AutoListen helps you scan the mapped structure quickly. It is useful when you want to hear the area under inspection without manually soloing each band one by one.
Global Amount
Global Amount scales Bell gain behavior in a broad way, which helps when you want to change the overall intensity of the corrective map without manually reworking every band.
Output
Output is there for level matching. After making corrective cuts or other shaping moves, use it to compare more fairly against the bypassed state.
Analyzer / Bypass / Flat Reset
Analyzer toggles the analyzer layer. Bypass disables the effect path. Flat Reset restores the broader EQ state more quickly than rebuilding the setup from scratch.
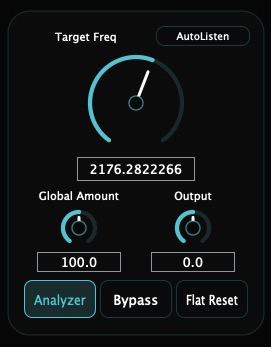
4. Link Modes: Octave And Harmonic
Link Type changes how the five bands distribute around the Target Frequency. This is one of the defining parts of SurgEQ-L5 because it changes the search pattern, not just one band.

Octave
Octave mode gives a broader, more evenly distributed corrective map around the Target Frequency. It is a good starting point when you want structural balance and easy frequency spacing.
Harmonic
Harmonic mode creates a tighter distribution that can feel more useful for pitched material or overtone-related buildup.
Separate Fine Tune memory
SurgEQ-L5 keeps separate Fine Tune memory for Octave and Harmonic modes, so each link type can preserve its own offset map.
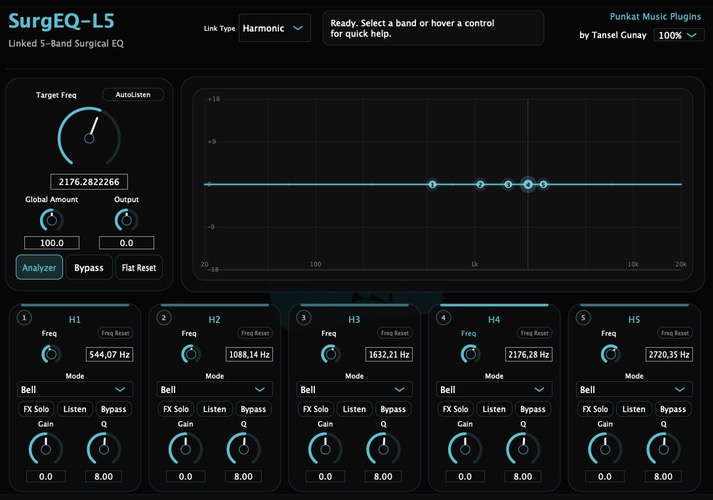
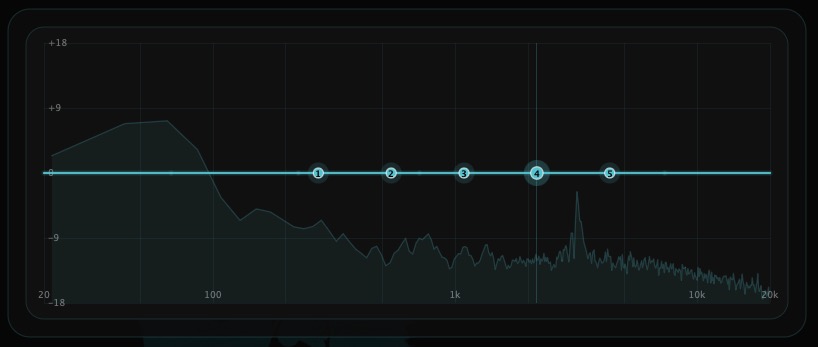
5. Band Cards And Per-Band Controls
The five cards are where the detailed correction happens. Each one represents a mapped band within the linked structure and exposes the controls needed to shape that band precisely.
Freq
This reflects the current mapped frequency of the band. It changes with the Target Frequency, Link Type, and any Fine Tune offset.
Freq Reset
Returns that band's Fine Tune offset to its mapped default position.
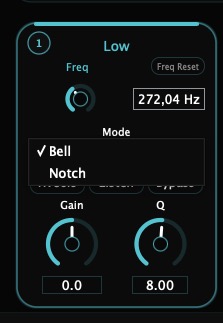
Mode
Switches the filter type for the band. Bell is useful for focused shaping, while Notch can dig much deeper into a narrow resonance.
Gain
Controls how much the Bell filter boosts or cuts. In Notch mode, gain behavior is not used the same way.
Q
Sets the filter width. Narrow values are useful for sharp ringing or resonance, wider values for gentler cleanup.
Fine Tune
Offsets the mapped band away from its default linked position. This lets you keep the overall structure but still place individual bands more precisely.
6. Listen Tools, FX Solo, And Analyzer
SurgEQ-L5 is built around hearing the frequency area clearly before deciding how to correct it. The audition tools are a major part of why the plugin can move quickly in practice.
AutoListen
Best when you want a fast scan through the mapped area without manually soloing every band one at a time.
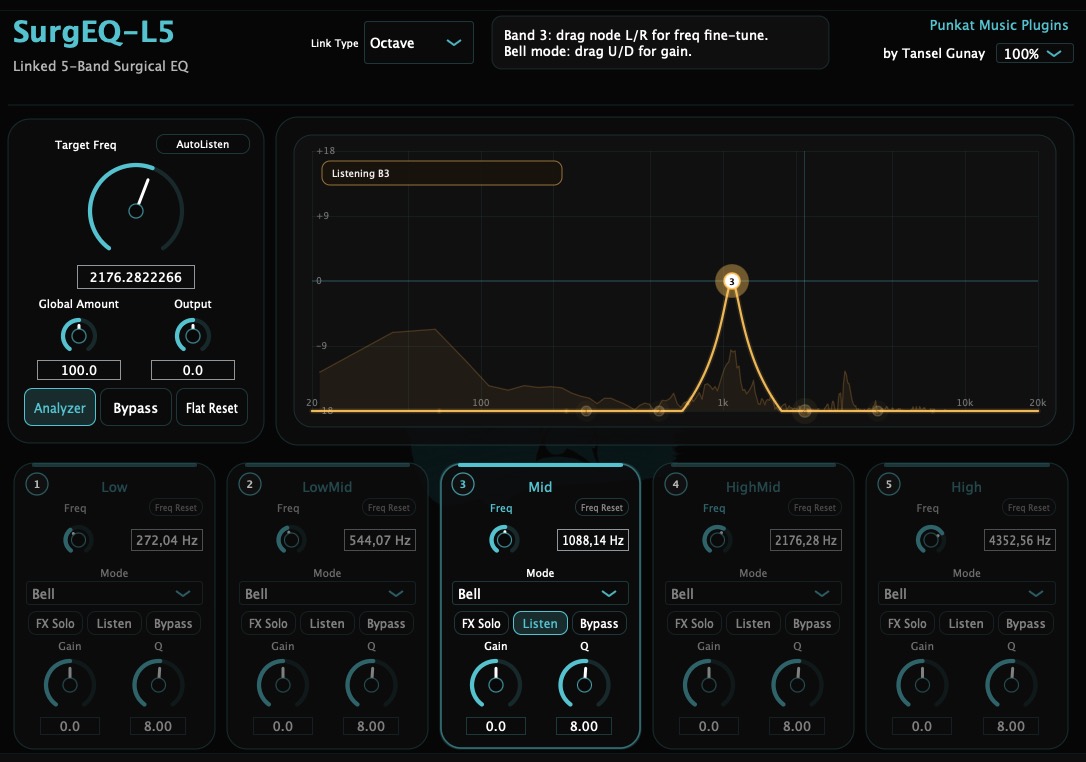
Listen
Best when you want to focus on what one specific band is centered around before committing to a finer move.
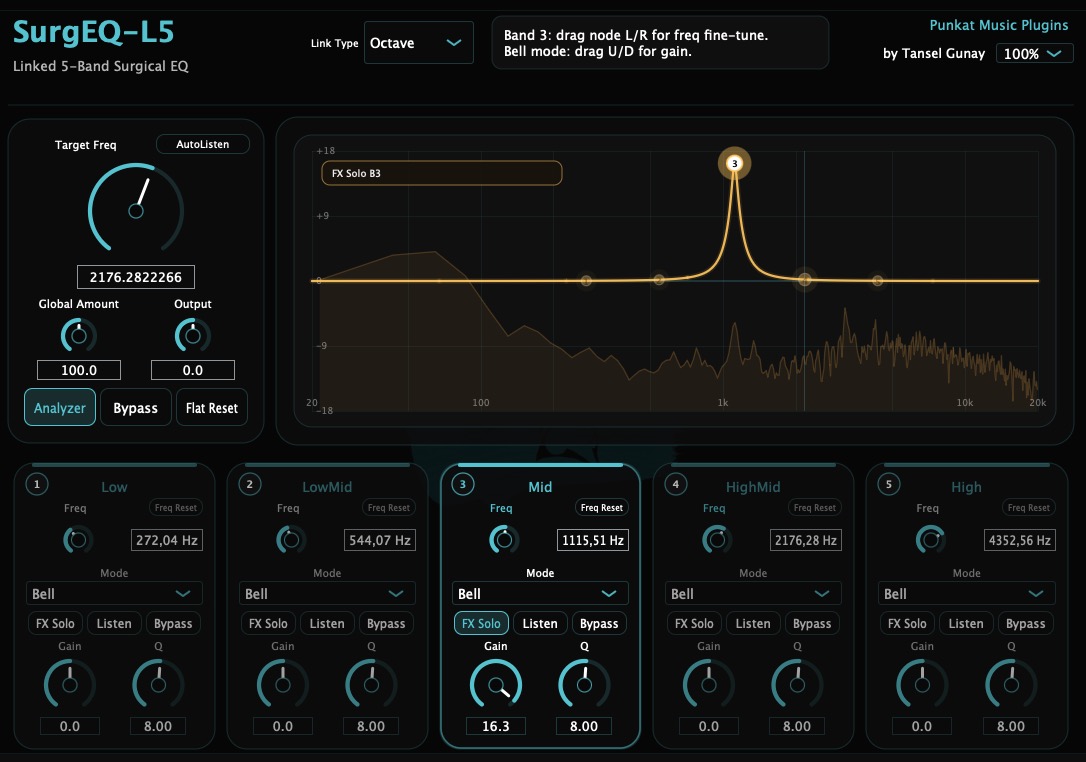
FX Solo
Best when you want to hear the processing emphasis of the selected band more directly and judge whether it is too much or too little.
How to use the analyzer correctly
The analyzer is there to support your decision-making, not replace it. Use it to see where the energy and the mapped bands sit, but let Listen, FX Solo, and full-context playback confirm whether the cut is musically right.
7. Practical Use Cases
The fastest way to understand SurgEQ-L5 is to think in terms of problem-solving scenarios.
Harsh vocal cleanup
Set the Target Frequency near the harsh zone, use Listen to identify the most unstable band, then narrow Q and make a controlled Bell cut or switch to Notch if the resonance is very sharp.
Snare ring control
Start with AutoListen or Listen to find the ring. Once the ring is clear, tighten Q and decide whether Bell or Notch gives the cleaner result.
Cymbal harshness
Harmonic mode can be especially useful when the harshness feels related to overtone buildup instead of one isolated peak.
Resonant synth cleanup
Use the analyzer to see the map, then Fine Tune the linked bands so they sit more precisely over the resonant areas.
Bus cleanup
Keep the moves smaller and use Output for level matching. On buses, even useful corrective cuts can feel too aggressive if you do not compare carefully.
Fast corrective search
Use Octave mode, broad Target Frequency placement, and AutoListen when speed matters more than perfect initial precision.
8. Tips And Best Practices
These habits help SurgEQ-L5 feel faster and more useful in real sessions.
Listen before cutting hard
Use the audition tools to hear the target clearly before making a steep, narrow move.
Start broad, then refine
Choose the overall map first. Fine Tune and deep corrective moves come after the structure feels right.
Choose the right link mode
Octave is broader and simpler. Harmonic is more clustered and can be better for pitched or resonant material.
Compare in context
Do not stay in solo modes too long. The final decision should be judged in the real mix context.
Use Output honestly
Level-matching helps you avoid mistaking “quieter” for “better.”
Use the analyzer as support
The graph and spectrum help you see the map, but your ear should still make the final call.
9. Installation, Activation, And Support
SurgEQ-L5 is delivered as a macOS plugin release and can also be shipped with this guide in the package.
Installation
- Run the included macOS installer package.
- Install the AU and/or VST3 formats to the standard system locations.
- Open your DAW and rescan plugins if needed.
- Load SurgEQ-L5 on a track, bus, or return.
Formats
- AU
- VST3
- macOS release
- Minimum macOS target: 10.13
Activation
SurgEQ-L5 uses serial activation. Enter the serial when prompted. The plugin validates the serial and activates the current machine.
On the same machine, a previously activated copy should reopen normally. If activation fails, confirm the serial, check your internet connection, and contact support if needed.
Support
For installer, activation, or product questions: